lunedì 18 novembre 2013

Tutorial : Easy Sparkle Sequins Infinity Cowl | Tutorial: Scaldacollo Semplice

Tutorial : Easy Sparkle Sequins Infinity Cowl
Tutorial facile: Scaldacollo  con le paillettes

Infinity Cowls are very fashionable this autumn - winter, bulky, as long as scarves wrapped around the neck 2-3 times.
Immediately I was tempted to buy the wool to knit one for me, immediately I changed my mind cause I have a short neck, wrap it in all that wool would make it look even shorter. A different Infinity Cowl is needed for me!

Questo autunno - inverno vanno molto di moda i scaldacollo di lana, molto abbondanti, come delle lunghissime sciarpe avvolte intorno al collo 2-3 volte.
Subito sono stata tentata a comprare la lana per farmene uno, poi ci ho ripensato: io ho il collo corto, avvolgermi in tutta quella lana lo farebbe sembrare ancora più corto. Per me ci vuole uno scaldacollo più semplice!

Also I did not want to knit, I’m very slow to #knit, so I took a look in my closet and I found what I needed !
A gray sweater , knitted by my mother for me, only that she did it too small. But for a neck warmer will be fine !

E poi non avevo voglia di sferruzzare, sono molto lenta a fare la maglia, così sono tornata a guardare nel mio armadio e ho trovato quello che mi serve!Un maglione grigio, lavorato a maglia da mia mamma per me, soltanto che me lo ha fatto troppo piccolo. Ma come scaldacollo andrà benissimo!


Here is the simple tutorial :
1 . Unpick and unravel the sleeves and the top of the sweater , until the armpits .
2 . Once you reach the desired height, close all the stitches with a knitting needle .
3 . The infinity cowl is ready, but if you want to make it even more interesting, you can sew on some sparkle sequins !
4 . Wear and enjoy your new scarf !


 Ecco il semplice tutorial:

1. Scucire e disfare le maniche e la parte superiore del maglione, fino all’altezza delle ascelle.
2. Una volta arrivati all’altezza desiderata, riprendere tutte le maglie su di un ferro per maglia e chiuderle.
3. Lo scaldacollo è pronto ma, per renderlo ancora più interessante, potete cucire sopra alcune paillettes!
4. Indossate e godetevi il vostro nuovo scaldacollo! 


I'm thinking of doing another Infinity Cowl, using a pink sweater also knit by my mom .... I'll see ....
What about you, do you make some new infinity cowls this year or do you get them store bought?

Until next time! 

Sto pensando di farmi ancora uno scaldacollo, modificando un maglione rosa sempre fatto da mia mamma…. Vedrò….

E voi, vi siete fate qualche scaldacollo nuova per quest’anno o lo avete comprato già pronto?Alla prossima!

martedì 12 novembre 2013

Free Dress Patterns and Tutorials - Listing with Photos and Links

Free Dress Patterns and Tutorials - a resourceful list for seamstresses


On this page I show to you my own collection of tutorials and free patterns, founded in the blogosphere in the last 2 years. After nearly losing all favourite links for 2 times , due to the failure of my computer , I started to write this page by grouping all the tutorials, with photos and links to the sites who generously share their sewing ‘s knowledge .

We all love to have free resources and sources of inspiration for our crafts. The more the merrier, right?
For those who begin sewing , nothing better than a free pattern and a free tutorial to make the first tests of cutting and sewing , without spending much.

My collection Free Dress Patterns and Tutorials contains only free #tutorials for dresses, mostly for women . The page will remain perpetually "under construction" , new tutorials will be added periodically. I invite you to visit it every now and then hoping you will find it useful .
If you have any tutorials you want to share, please let me know!

My intention is to create multiple lists , I'm working on a collection of tutorial for bags, handbags and grocery shoppers . I'm also grouping of the tutorials in ITALIAN , so I’m asking for your help to find tutorials in Italian language, cause they are very hard to find in the net!
  
I also created some boards on Pinterest , so you can follow me from there .

Here is my list so far:


Cartamodelli e Tutorial Gratuiti per cucire abiti (da donna) - una lista utile per le sarte

In questa pagina vi presento una mia raccolta personale di #tutorial e #cartamodelli gratuiti, scovati nella rete negli ultimi anni. Dopo aver rischiato di perdere tutti i link preferiti per ben 2 volte, a causa del cedimento del computer, ho iniziato a scrivere questa pagina dove raggruppare tutti i tutorial, con le foto ed i link ai siti che generosamente condividono le loro conoscenze di cucito.

Tutte noi, appassionate di cucito, amiamo avere delle risorse gratuite e fonti d’ispirazione per i nostri lavori. Più ce ne sono, meglio è, giusto?
Per chi vuole iniziare a cucire, niente di meglio che un cartamodello ed un tutorial gratuito per fare le prime prove di taglio e cucito, senza spendere molto.

La mia raccolta Free Dress Patterns and Tutorials contiene link a pagine di cartamodelli e tutorial GRATUITI di abiti, sopratutto da donna. La pagina rimarrà perennemente “in costruzione”, nuovi tutorial verranno aggiunti periodicamente. Vi invito quindi di visitarla ogni tanto e spero che la troverete utile.
Se avete dei tutorial che volete condividere, vi prego di farmelo sapere!

La mia intenzione è di creare più raccolte, al momento sto lavorando ad una lista per cartamodelli e tutorial di borse, borsette e buste per la spesa. Inoltre sto raggruppando dei tutorial di abiti in ITALIANO, quindi accetterò volentieri il vostro aiuto nel scovare tutorial in italiano, sono difficilissimi da scovare nella rete!
 
Ho anche creato delle board su Pinterest, quindi potete seguirmi anche da lì.

Ecco la mia lista ad oggi: 


Nautical Dress Nautical Dress


  Polka Dot Dress


20 Minutes Dress

Infinity Dress
Wrap Dress
Sonya Dress
Easy Top


Square Deal Dress             
Cinched Shift Dress
Drop elastic waist


Shirred Waist Dress


Shift Dress                                    
Boat Neck Dress
 Kimono Style Dress

T-Shirt Dress
Summer Dress


Colorblock V-Dress


      Nursing Dress  
Comfy Knit Dress
Picnic Dress
Teen T-Shirt Dress
Color Block Tunic                         


Baby Doll Summer Style


Quick Maxi Dress     


  .
I'm linking up at this Linky Parties:

 http://www.jaqsstudio.com


giovedì 7 novembre 2013

DIY Tutorial : How to shine a simple sweater with sparkle sequins

Tutorial DIY: Come illuminare un semplice maglione con le paillettes


Il mio guardaroba è pieno di maglioni e golfini di tanti colori, fatti a mano per me da mia mamma. Per lei lavorare a maglia è un passatempo, riesce a fare la maglia mentre guarda la Tv, senza guardare quello che fa con le mani!
Adesso che l’inverno è alle porte, avrò l’occasione di indossare i miei maglioni tutti i giorni. A me i maglioni piacciono semplici, senza motivi complicati, il dritto e rovescio è abbastanza per me.
Negli ultimi tempi mi è venuta la voglia di “illuminare” alcuni dei miei maglioni, facendoli un po’ “brillare”. Come ? Molto semplice, usando le paillettes, piccole scintille che si illuminano con i raggi di sole e ci mettono in risalto. 

wearing grey sequin sweater

Applicarli è molto semplice, basta un ago ed un filo, preferibilmente del colore del maglione. L’ago deve essere sottile, per poter passarlo in mezzo al foro delle paillettes. Una volta che ci si fa l'abitudine, cucire le paillettes diventa un gioco da ragazzi, in pochi minuti si può finire una riga.


sequins pink sweater

Con una piccola scatolina di soli 2 euro ho già cambiato l’aspetto di ben 5 capi tra maglioni e cardigan.
Sui primi che ho fatto sono andata sul “ordinato”, con le paillettes ben disposte su righe e colonne, per arrivare al “ordine casuale” sul cardigan nero che sto finendo adesso.  
Sono indecisa se cucire le paillettes su tutti e due i lati del cardigan…… credo che lo farò, perché il lato che ho già cucito è quello sinistro e, quando sono alla guida, le paillettes sono coperte dalla cintura di sicurezza. Con il lato destro non avrò questi problemi.
black cardigan with sequins


Su Pinterest (qui la miaboard – se vi va possiamo seguirci a vicenda) ho trovato molte idee di come ravvivare i vecchi cardigan, forse ne proverò altre; comunque la più veloce, economica e di grande effetto mi sembra questa delle paillettes. Ho in mente di comprare altre paillettes, in colori e forme diverse per sbizzarrirmi in altre refashion!


wearing sequins sweaters


DIY Tutorial : How to shine a simple sweater with sparkle sequins


My wardrobe is full of sweaters and cardigans in many colors , hand-made for me by my mom . She likes to knit, she can knit while watching TV, without looking at her hands!
Now that winter is coming, I will have the opportunity to wear my sweaters every day.
Recently, I got the urge to make "shining " some of my sweaters. How ? Very simple, using sparkle sequins, small sparks that glow with sunlight.
Apply them is very simple, you need just a needle and a thread, preferably the color of the sweater. The needle must be thin , in order to pass it to the hole in the middle of sequins. Once you get used to it , sew sequins becomes a breeze, in a few minutes you can finish a row.

With a small box of only 2 euros I have already refashion a number of 5 between sweaters and cardigans.
On the first I've done I went on the "ordered" , means the sequins arranged in rows and columns, to get to the " random " on the black cardigan I'm finishing now .
I'm undecided whether to sew the sequins on both sides of the front of the cardigan ...... I think I will, because the side that I've sewn is to the left and, when I’m driving , the sequins are covered by the safety belt . With the right side I will not have these problems.


On Pinterest ( this is myboard - if you like we can follow each other) I found many ideas of how to refashion old cardigan , maybe I'll try other; however sewing sparkle sequins is the faster, cheaper and impressive way to recycle a sweater. I plan to buy more sparkle sequins in different colors and shapes to play around in other refashion !

Wish you a bliss | Vi auguro una buona settimana! 

Carmen@filodimiele

I'm linking up with: 

http://katherinescorner.com/2013/11/06/thursday-favorite-things-blog-hop-113/
http://www.aglimpseinsideblog.com/

venerdì 25 ottobre 2013

Tutorial: How to recycle a dress into 2 aprons


Il tutorial che vi presento oggi è uno molto facile e utile, può essere provato anche dei principianti del cucito!
A chi non serve un grembiule in più in cucina! Personalmente uso SEMPRE il grembiule quando cucino, per evitare di sporcarmi i vestiti. Ne “consumo” tanti, quando vengono troppo brutti li butto, perché anche se sono in cucina, devo essere sempre presentabile, no?

The tutorial I am showing today is very easy and useful, it can be proved even by sewing beginner! Who doesn’t need one more apron in the kitchen! Personally I ALWAYS use an apron when I cook, to avoid dirty clothes . I use many, when they are too ugly I throw them, because even in the kitchen, I always have to be presentable, right?

L’anno scorso mi avevo cucito per me questo abito nero, in un tessuto leggero, in cottone, ma, per quanto mi piaceva la stoffa, l’abito non mi donava per niente…..e cosi, visto che ne avevo bisogno di un nuovo grembiule per la cucina e di un altro per la smielatura del miele, ho pensato di usare questo abito che occupava spazio utile nel mio armadio.

Last year, I’d sewn for me this black dress, in a lightweight cotton fabric, but even I liked the fabric , the dress doesn’t shape me  ..... and so , as I needed a new apron for the kitchen and another for extracting honey, I thought I'd use this dress!

Tutorial: Riciclare un abito e trasformarlo in due grembiuli:  
Tutorial : Recycle a dress and turn it into two aprons :

1. Scucire l’abito. Per questa operazione io ho preferito tagliare il tessuto vicino alle cuciture, per fare più veloce.  
2. Scucire le pince se ce ne sono.    
3. Disegnare un cartamodello partendo da un grembiule che avete in casa. Potete essere creative a questo punto e decidere voi come volete il grembiule, piccolo (dalla vita in giù) o con la pettorina come il mio.
4. Piegare la stoffa in due, con il diritto al interno.
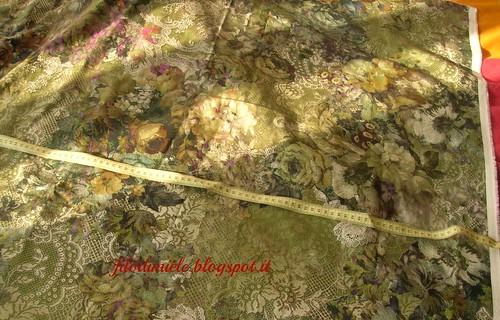
5. Appoggiare il cartamodello sulla stoffa e tagliare. Se avete sufficiente tessuto, lasciate 1 – 1,5 cm per i margini di cucitura.

1. Unpick the dress . To do this, I preferred to cut the fabric close to the stitching, to make it faster.
2. Unpick the darts if there are any.
3. Draw a pattern starting with an apron that you have at home . You can be creative at this point and decide how you want the apron, small ( from the waist down), or with the harness like mine.
4. Fold the fabric in half, with the right sides to the inside .
5. Place the pattern on the fabric and cut . If you have enough fabric left 1 - 1.5 cm for seam allowances.


6. Ripetere l’operazione con il secondo pezzo del abito, per il secondo grembiule (se ne volete due).
7. Orlare tutti i bordi del grembiule.
6. Repeat with the second piece of your dress for the second apron (if you want two )
7. Hem all edges of the aprons .

A questo punto ho finito il tessuto del abito, ma devo ancora fare i cordoncini per legarlo ed una taschina, così ho usato dei scampoli di tessuti che avevo in casa, uno rosa ed uno blu. 

8. Preparare i cordoncini per legare il grembiule. Non vi darò delle misure precise, in quanto dipende di come vi piace legare il grembiule, dietro o davanti. Personalmente lo lego sempre sul davanti, in quanto a casa mia si fa sempre lo scherzo di slegare il grembiule …….. I miei nastri sono quindi molto lunghi. Per farli potete seguire il metodo “bias tape” oppure cucire a rovescio, rigirare il nastro e ricucire. Nei prossimi giorni vi mostrerò anche il metodo “bias tape”, come lo faccio io.

At this point I finished the recycle fabric, but I still need to make the drawstrings and a small pocket , so I used some scraps of fabric I had at home, one pink and one blue .
8. Let’s prepare the drawstrings. I will not give you precise measurements, as it depends on how you like to tie the apron, behind or in front . Personally I always tie on the front, because in my house it always does the trick to untie the apron ........ So my drawstrings are very long . To get them you can follow the method of " bias tape" or sew in reverse, twist the ribbon and sew. I will soon show you the method of " bias tape", like I do .


9. Una volta preparati i nastri, posizionarli sul grembiule e cucirli. Con un metro da sarta misurare la lunghezza del cordoncino che legherà il grembiule attorno al collo. Preparate anche questo nastro e cucirlo.
9. Once prepared drawstrings, place them on the apron and sew . Then measure the length of the drawstring to tie the apron around the neck.

10. Piccola tasca: sempre con tessuto a contrasto ho fatto anche due piccole taschine arricciate. Come si fanno? Cosi: Tagliare la sagoma della tasca.
10. Small pocket : using contrasting fabric I also made two curled small pockets. How do I do ? Like this : Cut the shape of the pocket.


11. Cucite a zig-zag tutto attorno, per evitare che il tessuto sfilasse.
12. Tagliate un pezzo di elastico con circa 2-3 cm più piccolo del lato alto 
della tasca.
13. Ricoprite parzialmente l’elastico con il tessuto (come fare l’orlo) e, mentre lo cucite, tirate l’elastico, e la taschina verrà arricciata.
11. Sewn in a zig -zag all around, to prevent the fabric fraying.
12. Cut a piece of elastic with about 2-3 cm smaller than the upper side of the pocket.
13. Cover partially the elastic with the fabric (like hemming ) and while you sew , pull the elastic and the pocket will be curled.

14. Posizionate la tasca sul grembiule e rigirate i margini verso l’interno, fissate con degli spilli e cucite la tasca.
15. Indossate il grembiule e andate in cucina a preparare deliziosi manicaretti!
14 . Place the pocket on the apron and round the edges inward , secure with pins and sew the pocket.
15. Put on your apron and go to the kitchen to prepare delicious dishes ! 


Se usate il mio tutorial, fatemelo sapere, mi piacerebbe vedere i vostri lavori!

A presto!    

If you use my tutorial , let me know , I 'd love to see your work !

See you soon !

Con questo post partecipo a questi Linky Party: 
I’m linking up my post at:

sabato 12 ottobre 2013

Come fare la marmellata di fichi: la migliore del mondo! Fig Jam!

Come fare la marmellata di fichi: la migliore del mondo!

Grazie alla mia vicina Daniela, che mi ha regalato una busta di fichi del suo giardino, ho fatto la migliore marmellata del mondo!
Ho seguito alla lettera la ricetta della marmellata di fichi di giallozafferano.it, che potete trovare qui, e vi garantisco che è venuta squisita! La ricetta prevede l’uso di un limone intero, cioè la buccia ed il succo, magari per qualcuno può sembrare eccessivo ma io mi sono fidata e il risultato mi piace molto.
Ho personalizzato i miei barattoli con delle etichette fatte sempre da me. Inoltre ho avvolto i coperchi con delle carta colorata da imballo, fermata con uno spago da cucina.
La marmellata di fichi è ottima per la prima colazione ma anche abbinata ai formaggi, specialmente la toma piemontese.

Se siete indecisi su quale marmellata preparare per l’inverno, vi raccomando la marmellata di fichi, non ve ne pentirete!


How to make the fig jam: the best jam in the world!

Thanks to my neighbor Daniela, who gave me a bag of figs from her garden, I made the best jam in the world!
I followed the recipe of the fig jam of giallozafferano.it, that you can find here, and I guarantee you that has come exquisite! The recipe calls for the use of a whole lemon, peel and juice , maybe for someone may seem excessive, but I trusted and I like the result very much.

I customized my jars with homemade labels, made ​​by me . I also wrapped caps with the colored paper for packaging, stop it with a kitchen string.
The fig jam is great for breakfast but also paired with cheeses, especially the Toma Piemontese.


If you are undecided about which jam prepare for the winter, I recommend the fig jam, you will not regret! 


Have a bliss today! 

Carmen (Filodimiele)

sabato 21 settembre 2013

Le mie gonne / My skirts - Sewing for me Series

Ciao e Ben ritrovati!

Ritorno alla mia serie Riepilogo dei (miei) vestiti cuciti da me. Oggi vi presento le gonne !
Rispettando la mia fisicità, metto solo gonne dritte, chiuse con la cerniera dietro, alcune con le tasche. Questi tipi di gonne sono relativamente semplici da fare, fino adesso ne ho fatte  5, eccole qui!

Hello and Welcome back!

I'm back with my series Summary of (my) clothes sewn by me. Today I show you my skirts!
Respecting my physicality, I only wear straight skirts, closed with the zipper behind, some with pockets. These types of skirts are relatively simple to do, so far I've done 5, here they are!

gonne


Dovete sapere che io non mettevo mai ne le gonne ne gli abiti fino a 3 anni fa, quando mi sono appassionata di cucito. Piano piano ho iniziato a puntare di più sulla femminilità, cercando di vestirmi con più gusto e originalità. E la femminilità si esprime meglio con una gonna o un abito. Così il mio guardaroba ha iniziato a riempirsi con pezzi fatti da me, imitando quelli che avevo già nell’armadio o quelli che vedevo in giro.
La mia gonna preferita, che ho messo tantissimo questa estate, è quella rossa. 


You should know that I did not ever put it neither skirts or clothes untill 3 years ago, when I start being passionate about sewing. Slowly I started to focus more on my femininity, trying to dress with more taste and originality. Femininity is best expressed with a skirt or a dress. So my wardrobe began to fill with pieces made ​​by me, imitating those that I had in the closet or the ones that I saw around.
My favorite skirt is the red one, I wear it a lot this summer.

red flowers

Proprio oggi ho finito un’altra gonna, fatta da una stoffa in raso con dei fiori:
Today I've just finished another skirt, made ​​from a satin flowers fabric:

flower skirt

I fiori sono ancora di tendenza questo autunno, così ho in piano ancora una gonna con i fiori, fatta con questo tessuto: 
The flowers are still trendy this fall, so I still plan to sew a skirt with flowers, made with this fabric:
flower fabric

Sapete quale è il segreto per sembrare più magre indossando una gonna? Bisogna spostare le cuciture laterali più in avanti, vuol dire fare la parte dietro più larga del davanti. Stessa cosa vale anche per i pantaloni. Le cuciture laterali spostate fanno sembrare le gambe più snelle!
Un’altra buona notizia: le gonne che mi sono fatta l’anno scorso sono tutte da stringere in vita. Che bello! Il mio impegno di dimagrire sta dando i suoi frutti! Non sto facendo una vera dieta, non ne sono capace, semplicemente cerco di limitarmi nel mangiare e nel bere bibite gassate e muovermi di più, facendo esercizi mirati per la pancia ed i fianchi….. Vi terrò aggiornati su come procedo….

A voi piacciono le gonne? Avete una gonna preferita?
A presto con un filodimiele,
Carmen 

Do you know what is the secret to look slimmer wearing a skirt? You have to move forward side seams, means making the back part wider and the front part smaller . Same thing goes for pants. The side seams moved makes legs look slimmer!
More good news: the skirts that I made last year need to be tightened at the waist. How nice! My commitment to lose weight is paying off! I'm not doing a real diet, I can not do it, just try to limit myself in eating and drinking sodas and moving more, doing targeted exercises for the stomach and hips ..... I will keep you updated on how to proceed ....

To you like skirts? Do you have a favorite skirt?
See you soon with a filodimiele,
Carmen


Linking up with : 

A round tuit 172

martedì 17 settembre 2013

Follow Filodimiele on Bloglovin

Che bello, 
Da oggi potete anche seguirmi con Bloglovin'!


<a href="http://www.bloglovin.com/blog/10694587/?claim=rrkd7eggc63">Follow my blog with Bloglovin</a>


How nice is that, 
You can follow me with Bloglovin'! 

sabato 14 settembre 2013

Draping dress and tops – review dei miei lavori di cucito

Ciao a tutti,
Ho pensato che sarebbe bello fare un riepilogo dei miei lavori di cucito, specialmente dei vestiti che mi sono fatta per me.
Oggi  vi mostrerò gli abiti e le maglie “a drappeggio”. Negli ultimi due anni ne ho cuciti parecchi, mi piace come mi veste il “drappeggio”, cade sempre bene.

Uso sempre il tessuto “knit”oppure jersey, cioè quello morbido che si usa per le t-shirt, ma non si trova necessariamente “knit” in cotone, spesso è fatto con fibre sintetiche. Questo tipo di tessuto è molto comodo da indossare e da cucire, non ha bisogno di essere stirato. Non sfila, quindi si possono lasciare i vestiti senza orlo, volendo. Io faccio sempre l’orlo, per dare finitura maggiore al capo, semplicemente piegando una volta su stesso il tessuto ed il gioco è fatto! 

Hello dears,
I thought it would be nice to show you an overview of my sewing projects, especially the clothes I've done for me.
Today I will show you the dresses and tops "draped". Over the past two years, I have sewn several, I like how the "drape" dress me , always falls well.
I always use fabric "knit" or jersey, ie the one used for the soft t-shirt, but is not necessarily "knit" cotton, it is often made ​​with synthetic fibers. This type of fabric is very comfortable to wear and sewing, does not need to be ironed. Not frays, so you can leave your clothes without hem
, if you want. I always do the hem, to give greater finish to the head, simply bending once on the same fabric and I'm done!


Questo abito l’ho cucito in agosto, un semplice drappeggio al collo lasciato scivolare morbido sulla linea del corpo. Per farlo più originale, più mio, l’ho cucito in due colori: il davanti un motivo geometrico ed il dietro in color viola semplice. Appena terminato però non mi stava troppo bene: le spalline cadevano sulle spalle, dovevo continuamente rimetterle a posto. Mi serviva un’idea per risolvere la situazione e l’ho trovata! Con due stringhe di stoffa viola ho raccolto le spalline e ora stanno al loro posto…. Adesso il mio abito è perfetto, lo metto molto spesso e mi piace tanto. 

I sewed this dress in August, just a simple cowl drape neck slipping on the line of the body. To make it more original, more mine, I sewed it in two colors: the front in a geometric pattern and the back simply purple fabric . But when I finished it didn't fit me well: : the straps were falling on my shoulders, I had to continually put them back. I needed an idea to resolve the situation and I found it! With two strings of purple cloth I picked up the straps and are now in their place .... Now my dress is perfect, I wear it very often and I like it so much. 


Sulla stessa scia, di un semplice abito a drappeggio, ho cucito anche questo: 
In the same vein, I sewed this simple draped dress too:


Questo tessuto con le ancore mi è subito piaciuto quando l’ho trovato a GS Scampoli a Venaria Reale, me lo immaginavo proprio per un abito, perché la trama del tessuto è molto lunga e molto bella.
This fabric with anchors I immediately liked when I found it to GS Scampoli in Venaria Reale, I imagined it good for a dress, because the texture of the fabric is very long and very beautiful


Una maglietta fatta a giugno, sempre a drappeggio, sempre fatta con due tessuti jersey: il davanti color fucsia ed il dietro un tessuto a righe con una parte nera, ne avevo ancora un po’ rimasto dell’anno scorso quando ho fatto le infinity scarves…   
A shirt made ​​in June, also a draped one, made ​​with two jersey fabrics: the front made from a fuchsia-colored and the back from a striped fabric with a black part, a remainder from last year ' when I made infinity scarves ...


L’anno scorso invece avevo fatto:
1. un abito drappeggiato color blu scuro
2. un abito drappeggiato color nero, con le maniche in pizzo nero
3. una maglietta rossa con dei fiorellini.
La maglietta è l’unica fatto con un tessuto non-knit, infatti il drappeggio “non cade” bene, rimane un po’ rigido.

Last year I sewn :
1. a dark blue draped dress
2. a black draped dress, with sleeves in black lace
3. a red shirt with small flowers.
The shirt is the only made with a non-woven knit, in fact the drape does not falling" well, it remains a bit rigid


A voi piacciono gli abiti a drappeggio? A qualcuno può interessare un piccolo tutorial su come fare il drappeggio?


Nei prossimi post vi mostrerò le magliette che mi sono fatto fino adesso, le gonne, le sciarpe ed altro ancora……

A presto con un filodimiele,
Carmen 

Do you like draping clothes? Would you be interesting in a small tutorial about how I make the drape ?


In the next posts I will show you the shirts that I have done so far, skirts, scarves, and more ......

See you soon with a filodimiele
,
Carmen


Linking up to: 

Related Posts Plugin for WordPress, Blogger...